Transform DIY Tutorials into Masterpieces with CapCut Desktop Video Editor
- Thursday, January 02, 2025
Creating compelling DIY tutorial videos has become popular for sharing skills, teaching new concepts, and inspiring creativity across platforms like YouTube, Instagram, and TikTok. Whether you're showcasing your skills in crafting, cooking, home improvement, or tech hacks, a polished and engaging video can make the difference between a viewer simply scrolling past or becoming an ardent fan of your content. CapCut Desktop Video Editor is a free video editing software, that provides creators with amazing tools to transform their DIY tutorials into visually stunning masterpieces.
The Importance of Video Editing for DIY Tutorials
DIY tutorials rely heavily on clear, concise, and visually appealing instructions. A raw video, no matter how well-planned, often needs enhancement to captivate the audience. Effective video editing helps to:
- Enhance Clarity: By cutting unnecessary parts, adding captions, and zooming in on intricate details, you ensure viewers grasp the steps easily.
- Increase Engagement: Smooth transitions, background music, and animations keep viewers hooked.
- Establish Professionalism: A well-edited video projects credibility and encourages viewers to trust your expertise.
- Highlight Creativity: Unique effects and customizations showcase your style and creativity, setting you apart.
CapCut desktop video editor is uniquely suited to address these needs with powerful yet user-friendly tools.
What Sets CapCut Desktop Video Editor Apart for DIY Creators?
CapCut desktop video editor offers an intuitive interface that caters to beginners while providing advanced features for seasoned creators. Its accessibility and features make it a preferred choice for editing DIY tutorials.
Key Features:
- Free to Use: Unlike many professional-grade editors, CapCut Desktop Video Editor is free, removing financial barriers for creators who want to achieve polished results without breaking the bank.
- User-Friendly Interface: Even first-time users can navigate CapCut's tools effortlessly. The drag-and-drop timeline, preset templates, and easy-to-access tools streamline the editing process.
- Advanced Editing Features: CapCut Desktop Video Editor provides advanced tools like chroma key (green screen), multi-layer editing, remove background from video, motion tracking, and keyframe animations. These enable creators to experiment with sophisticated effects and achieve professional results.
- Rich Effects Library: The platform offers an extensive collection of filters, transitions, and effects that can make DIY videos stand out. You can create anything from a vintage cooking tutorial to a futuristic tech hack video with ease.
- Text and Subtitles: Tutorials often require on-screen text for steps, tips, or important notes. CapCut's auto-captioning tool, with customization options for fonts, colors, and animations, saves time and enhances accessibility.
- Royalty-Free Assets: The CapCut desktop video editor has a library of royalty-free music and sound effects. You can select background tracks or sound effects that align with the mood and pace of your tutorial.
- Cross-Platform Integration: Projects created on the desktop version can seamlessly sync with CapCut's mobile app, allowing creators to edit on the go.
How to Transform Your DIY Videos with CapCut Desktop Video Editor
Here's a step-by-step guide to taking your DIY tutorial from concept to masterpiece using CapCut:
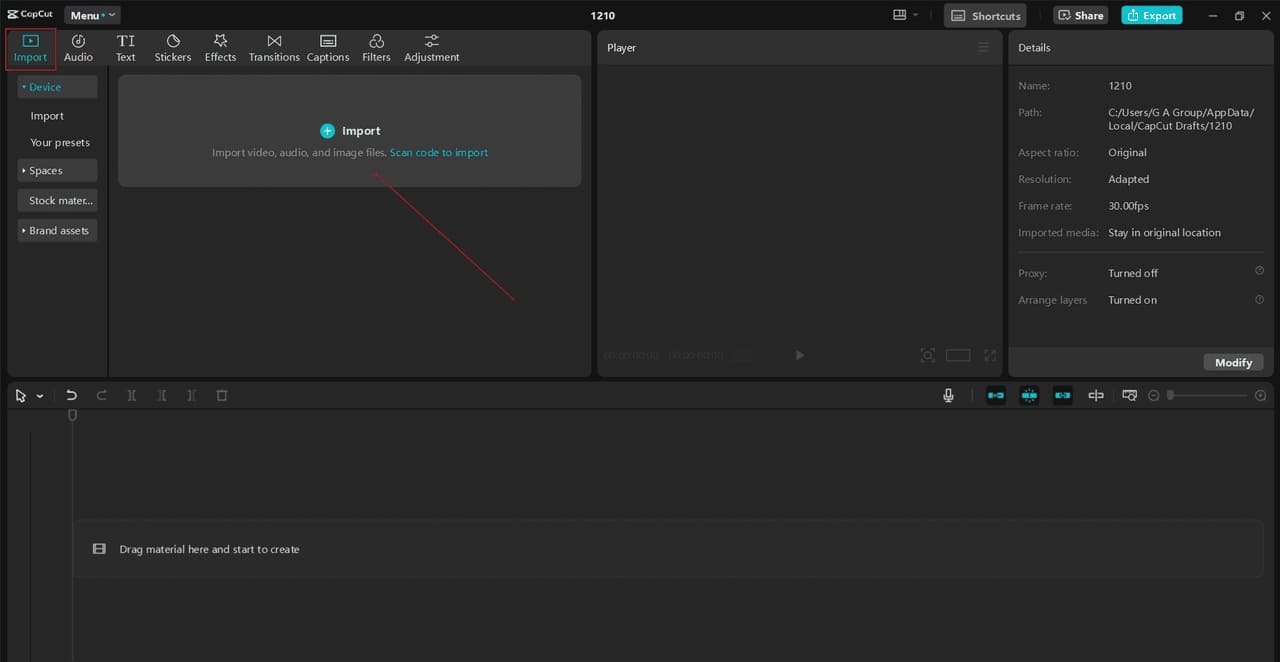
Step 1: Import and Organize Your Footage
Begin by importing your raw footage into CapCut. The editor supports multiple file formats and resolutions, ensuring compatibility with your camera or smartphone recordings. Organize your clips in the timeline, trimming excess footage to keep the content concise.
Step 2: Add Structure to Your Video
DIY tutorials often follow a clear structure:
- Introduction: Briefly introduce yourself and the project.
- Materials: Show the required tools or ingredients.
- Steps: Explain the process step-by-step.
- Final Reveal: Showcase the completed project.
Use CapCut's split and merge tools to segment your video into these sections. Use title cards and captions to introduce each segment for better clarity.
Step 3: Focus on Visual Appeal
Enhance the visuals by applying filters and color grading. For example:
- Use bright, cheerful tones for crafting or baking videos.
- Opt for neutral, professional hues for tech or repair tutorials.
Zoom in on intricate details or specific steps using keyframe animations. This is especially useful in craft or makeup tutorials where precision matters.
Step 4: Include Audio Enhancements
CapCut offers text-to-speech, which makes it easy to record or import voiceovers directly. Use the noise reduction tool to remove background noise and maintain clear audio. Add background music that complements the video's tone, adjusting the volume so it doesn't overpower your narration.

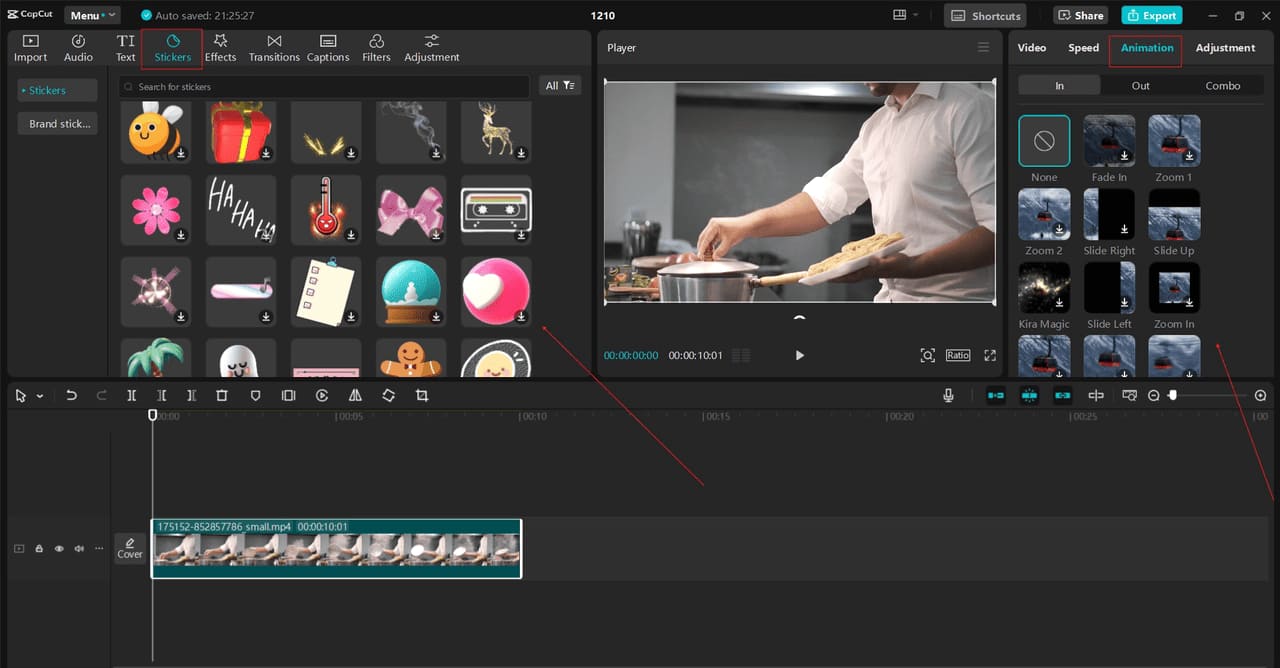
Step 5: Add Transitions and Effects
Smooth transitions between segments keep viewers engaged. CapCut offers a variety of transitions, from subtle fades to dynamic zoom effects. Use animations to highlight important points or demonstrate transformations effectively.
Step 6: Use Subtitles and Annotations
CapCut's auto-captioning tool saves time while ensuring your tutorial is accessible to a wider audience, including those watching without sound. Annotations like arrows, shapes, or highlights can draw attention to key details.

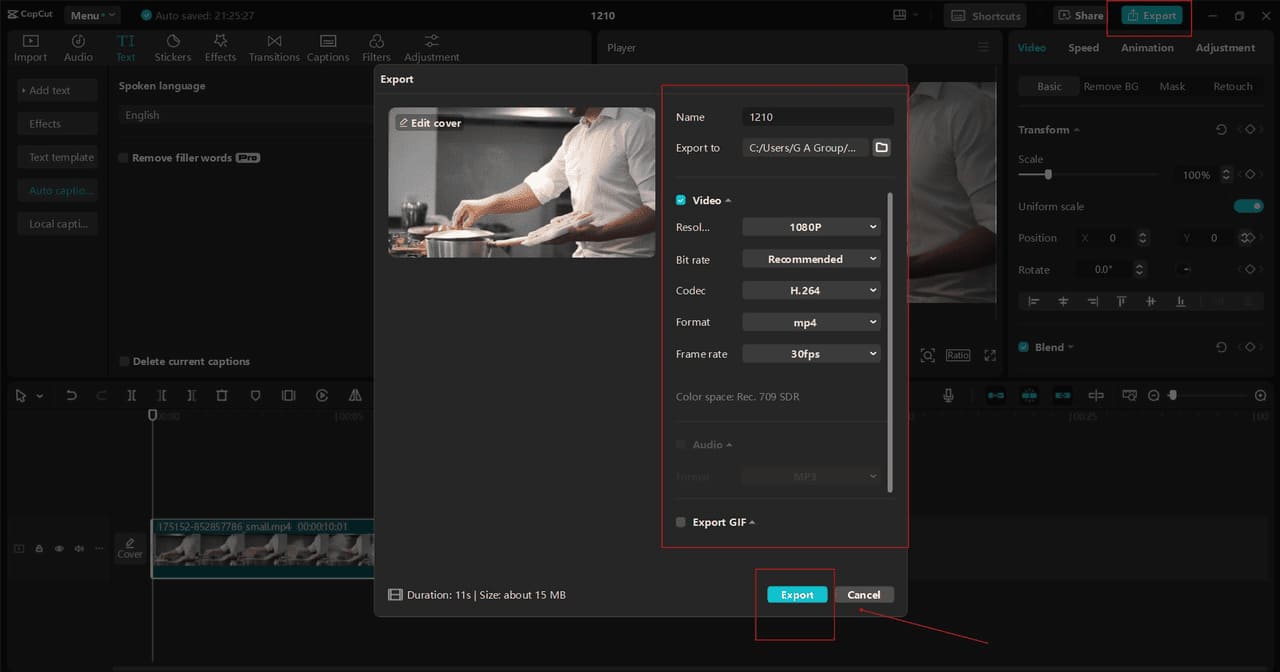
Step 7: Export and Share
After editing, preview the final video to ensure all elements flow seamlessly. CapCut allows you to export videos in various resolutions, including 4K, ensuring high-quality output. Share your masterpiece on platforms like YouTube, Instagram, or TikTok, optimizing it for each platform's requirements.
Pro Tips for Success with CapCut Desktop Video Editor
- Plan Your Content: Draft a storyboard or outline before shooting your video. Knowing what shots you need will make editing faster.
- Experiment with Features: CapCut's tools are versatile. Explore its effects, transitions, and filters to find what works best for your style.
- Keep it Concise: Attention spans are short. Edit ruthlessly to remove unnecessary content and keep your tutorial focused.
- Optimize for Platforms: CapCut allows you to format videos for different aspect ratios (16:9, 1:1, 9:16). Tailor your content for your target platform.
Conclusion
With its simplicity and powerful features, CapCut Desktop Video Editor is the perfect tool for creators looking to elevate their DIY tutorials. Whether a beginner or an experienced editor, the platform offers everything you need to transform raw footage into a professional-quality masterpiece. Start creating with CapCut, and watch your tutorials captivate and inspire audiences worldwide!